Shopify
How to Change Shopify Store Name
This blog provides a step-by-step guideline to help you change the store name of your Shopify website correctly and easily.
We've all seen and used GIFs before. GIFs, like memes, help you express feelings without having to say anything. As a result, gifs are becoming increasingly popular among millennials.
Gif stands for Graphics Interchange Format. Gifs are not videos. A gif comprises of multiple images at once and creates a kind of video with no sound.
Using gifs is similar to using emojis. You can share the one that is most appropriate for your situation.
The following is a step-by-step tutorial for creating an animated GIF in Photoshop.
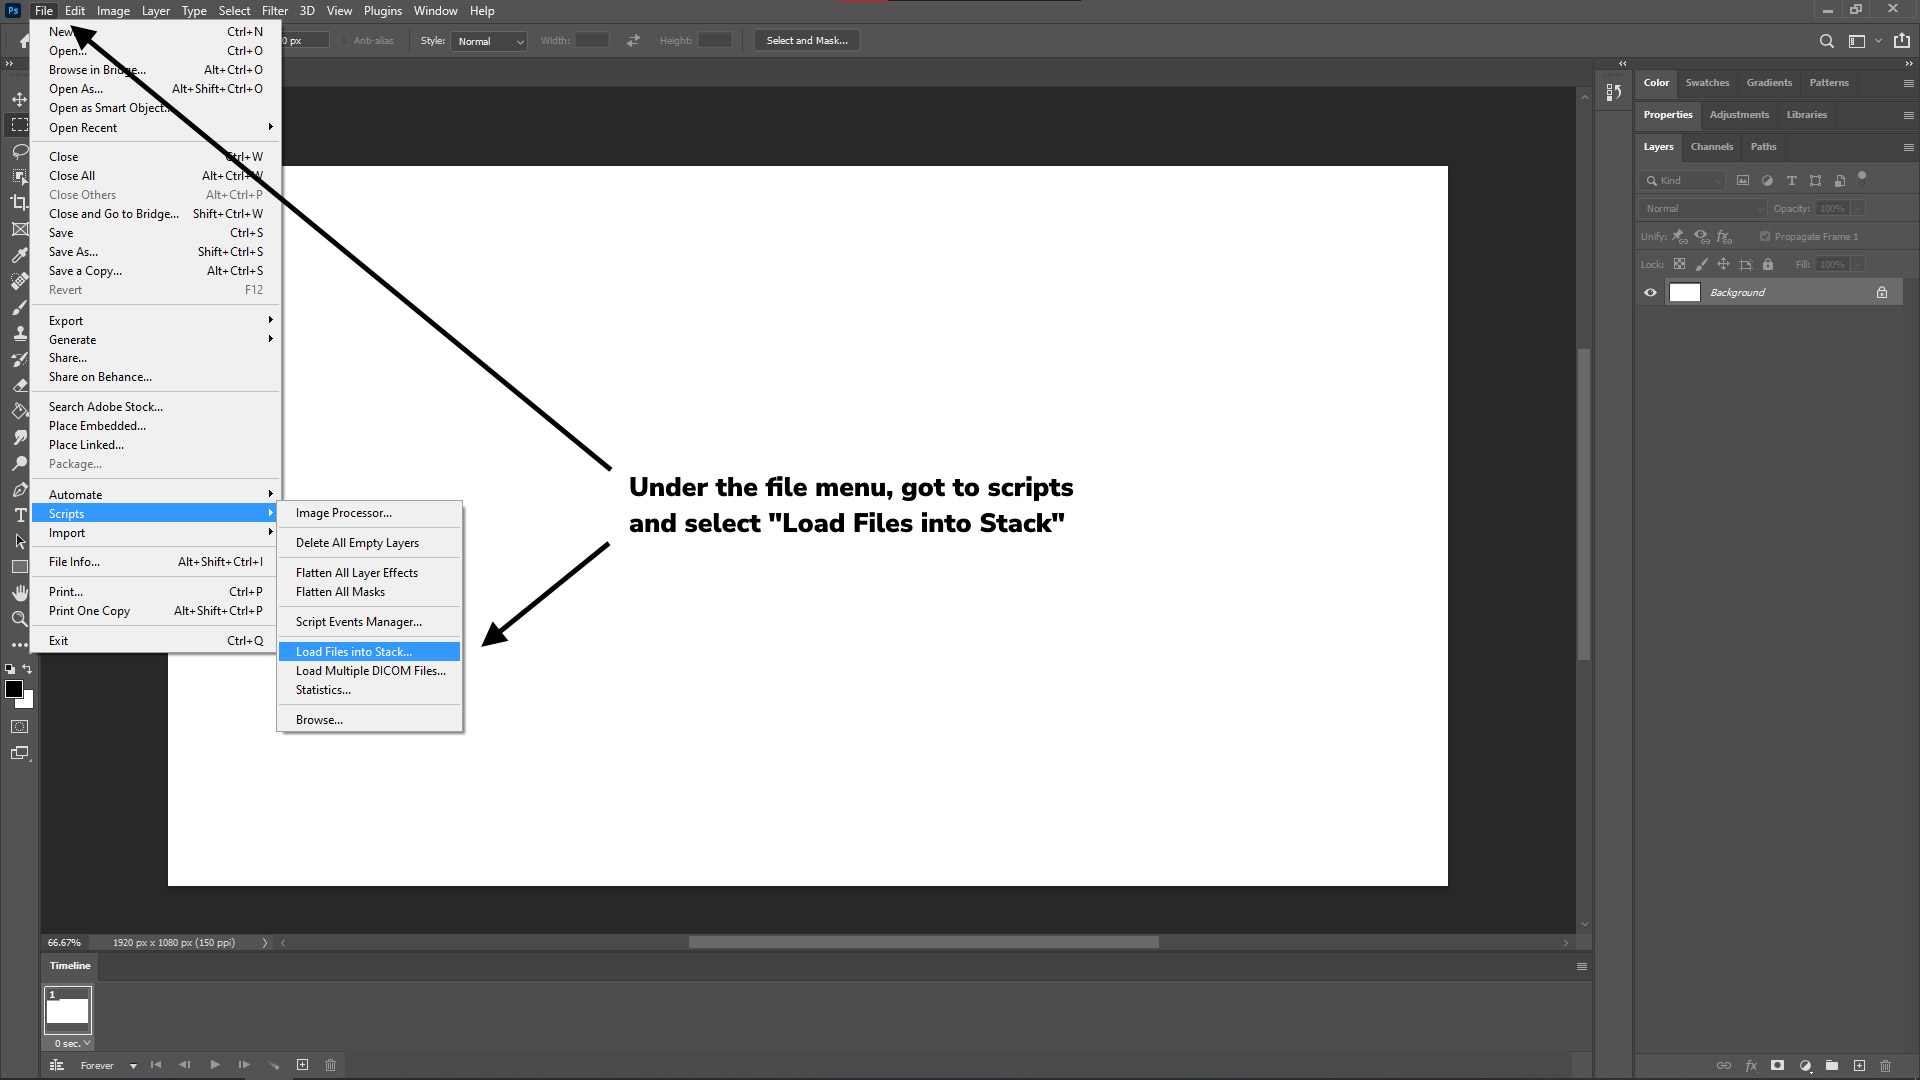
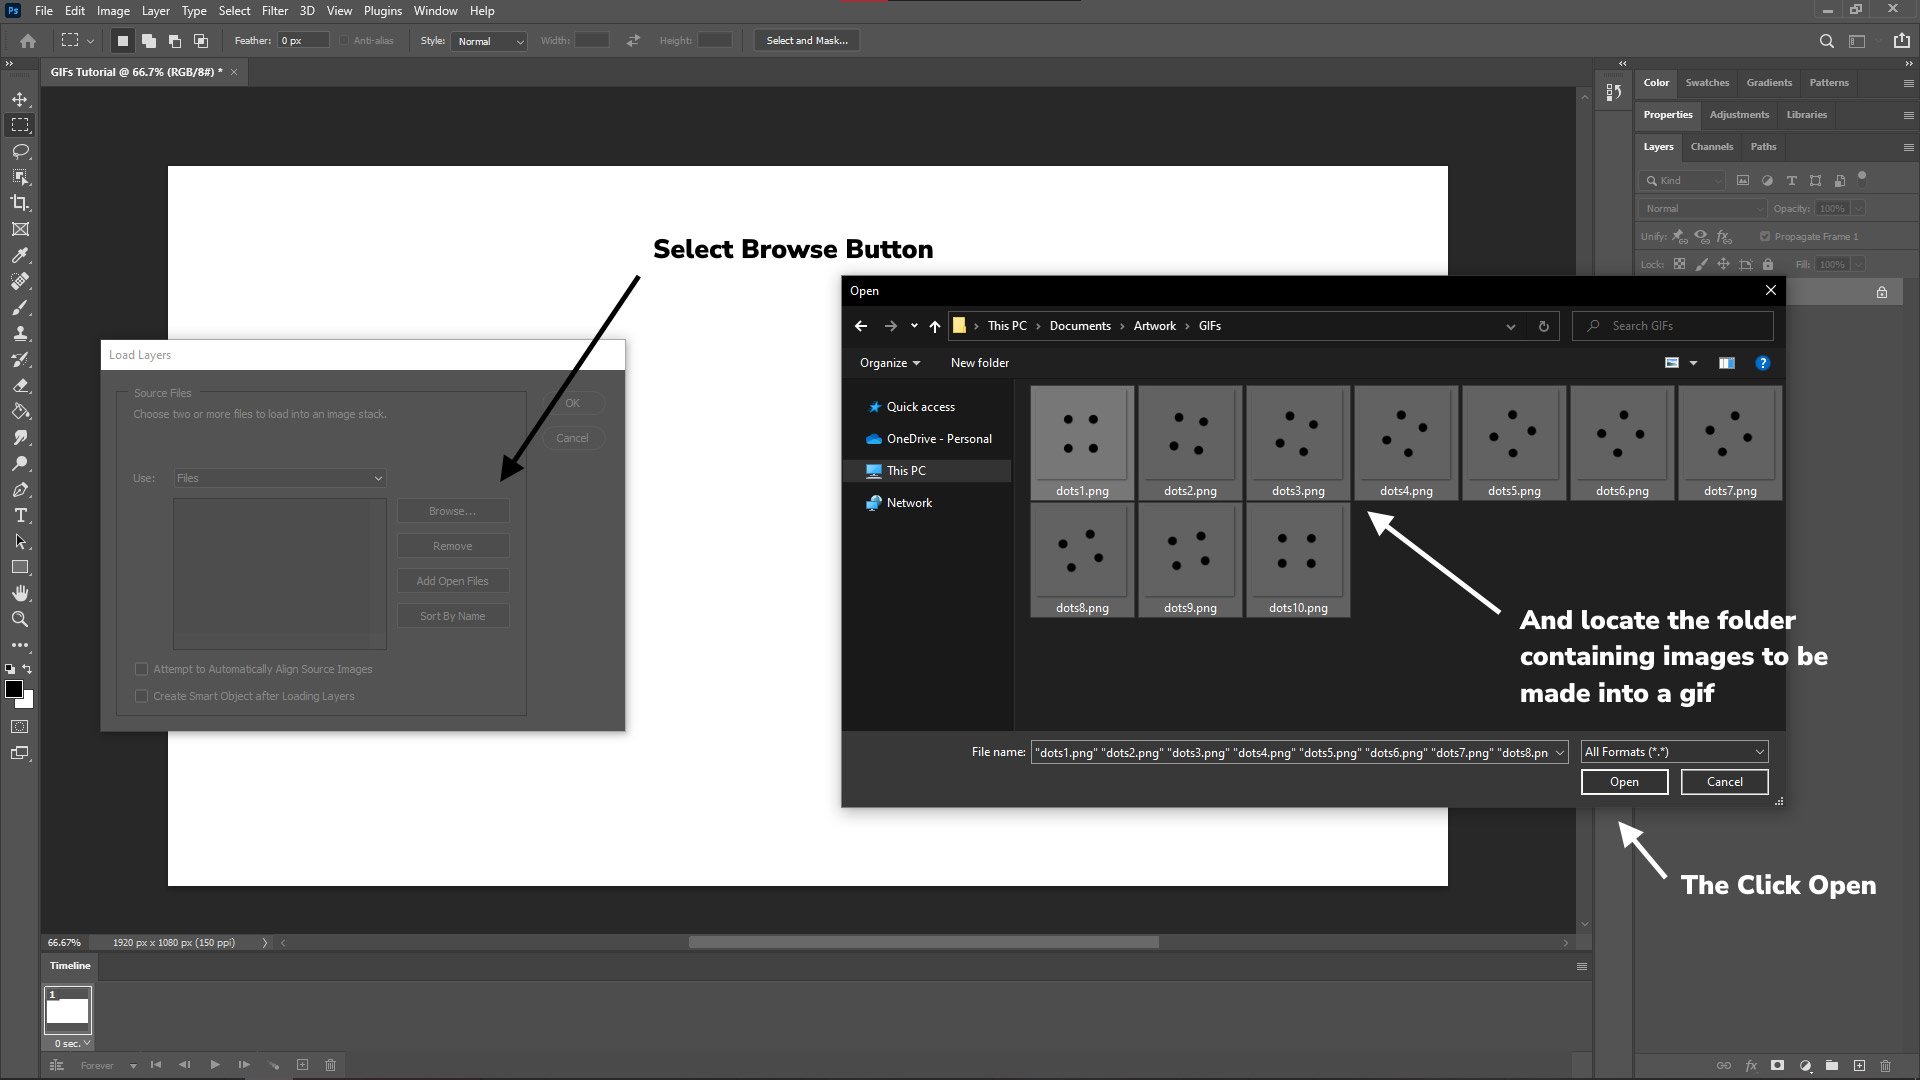
Step 1: Launch Photoshop and click to File > Scripts > Load Files into Stack. Now navigate to the location where you saved the photographs and choose the images using the browser option. Select a number of photos from which the gif should be made. Select Open after that. Photoshop will now combine all of these files into a single document.
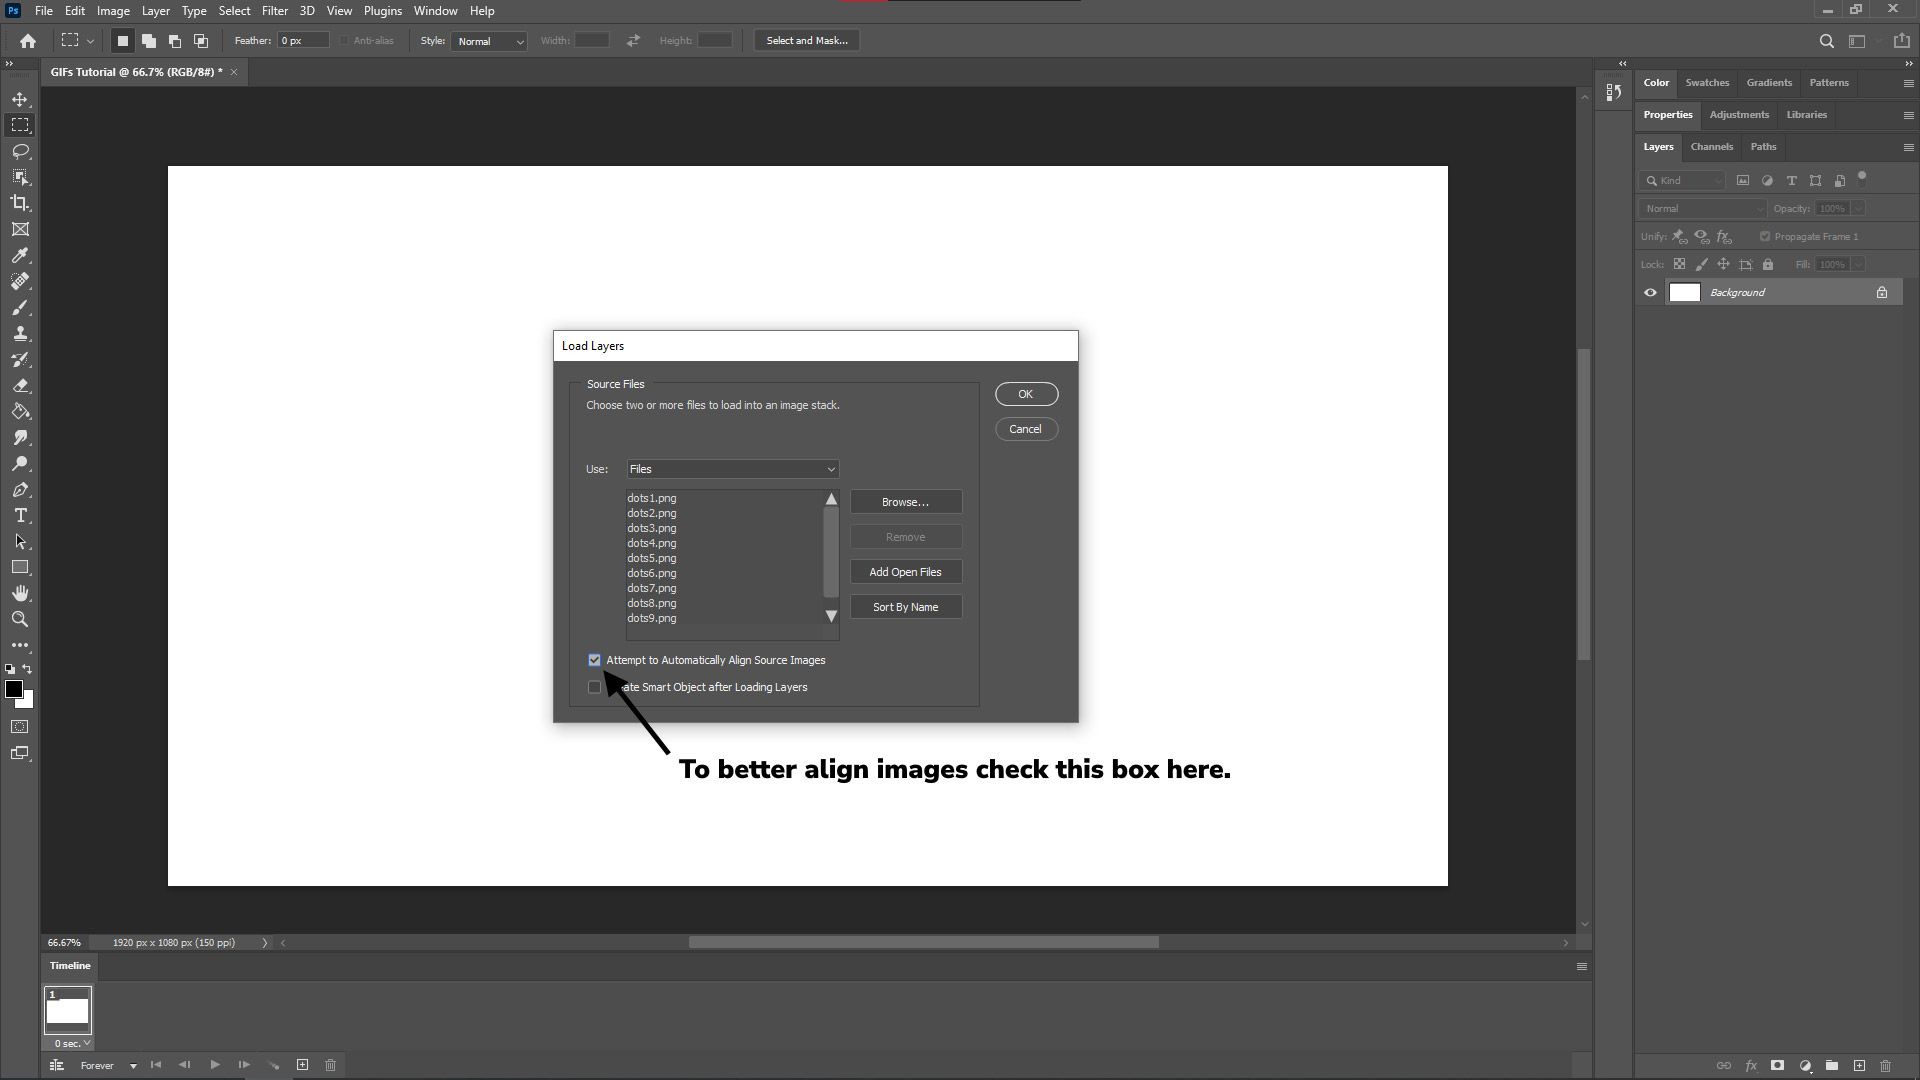
Note: If you suspect that you may not have images in a sequence, then pick the option of "Attempt to automatically align source images". Now select OK. All of the data will be aligned, allowing the animated GIF to play smoothly.
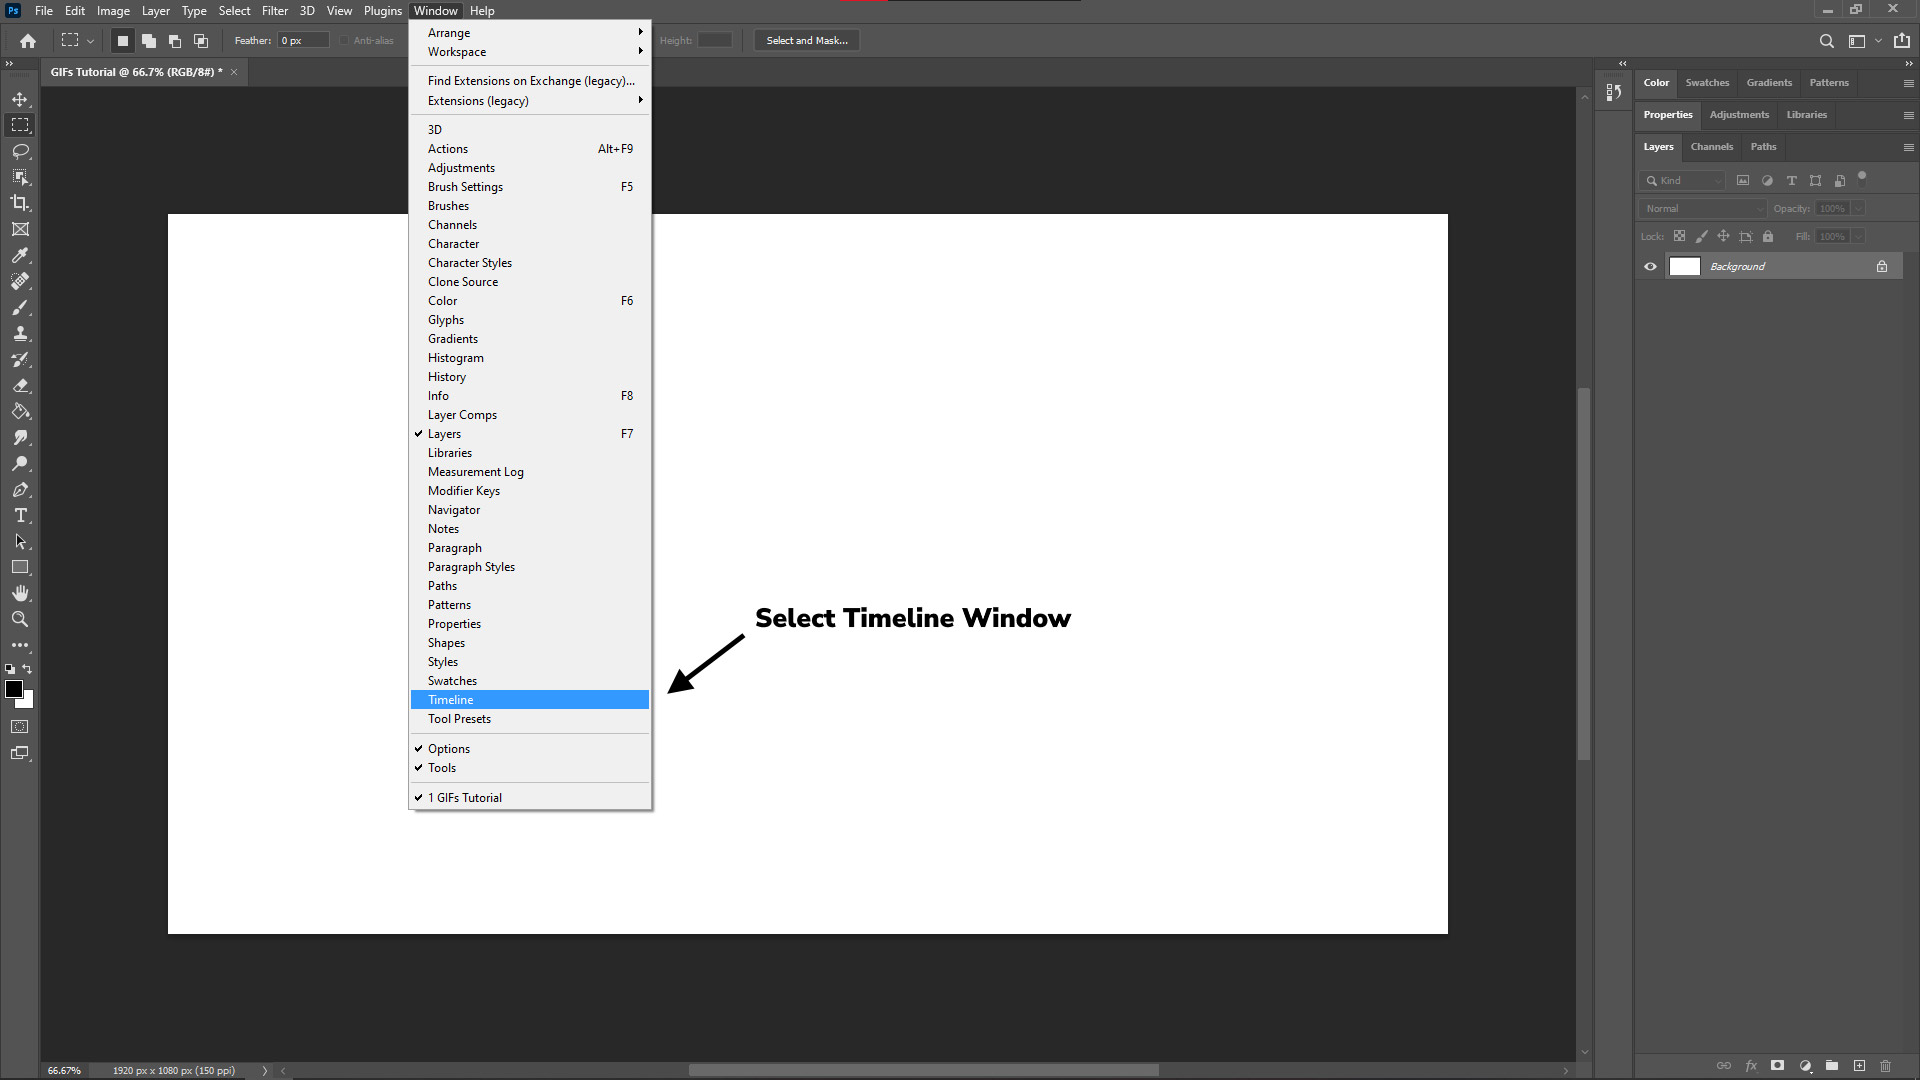
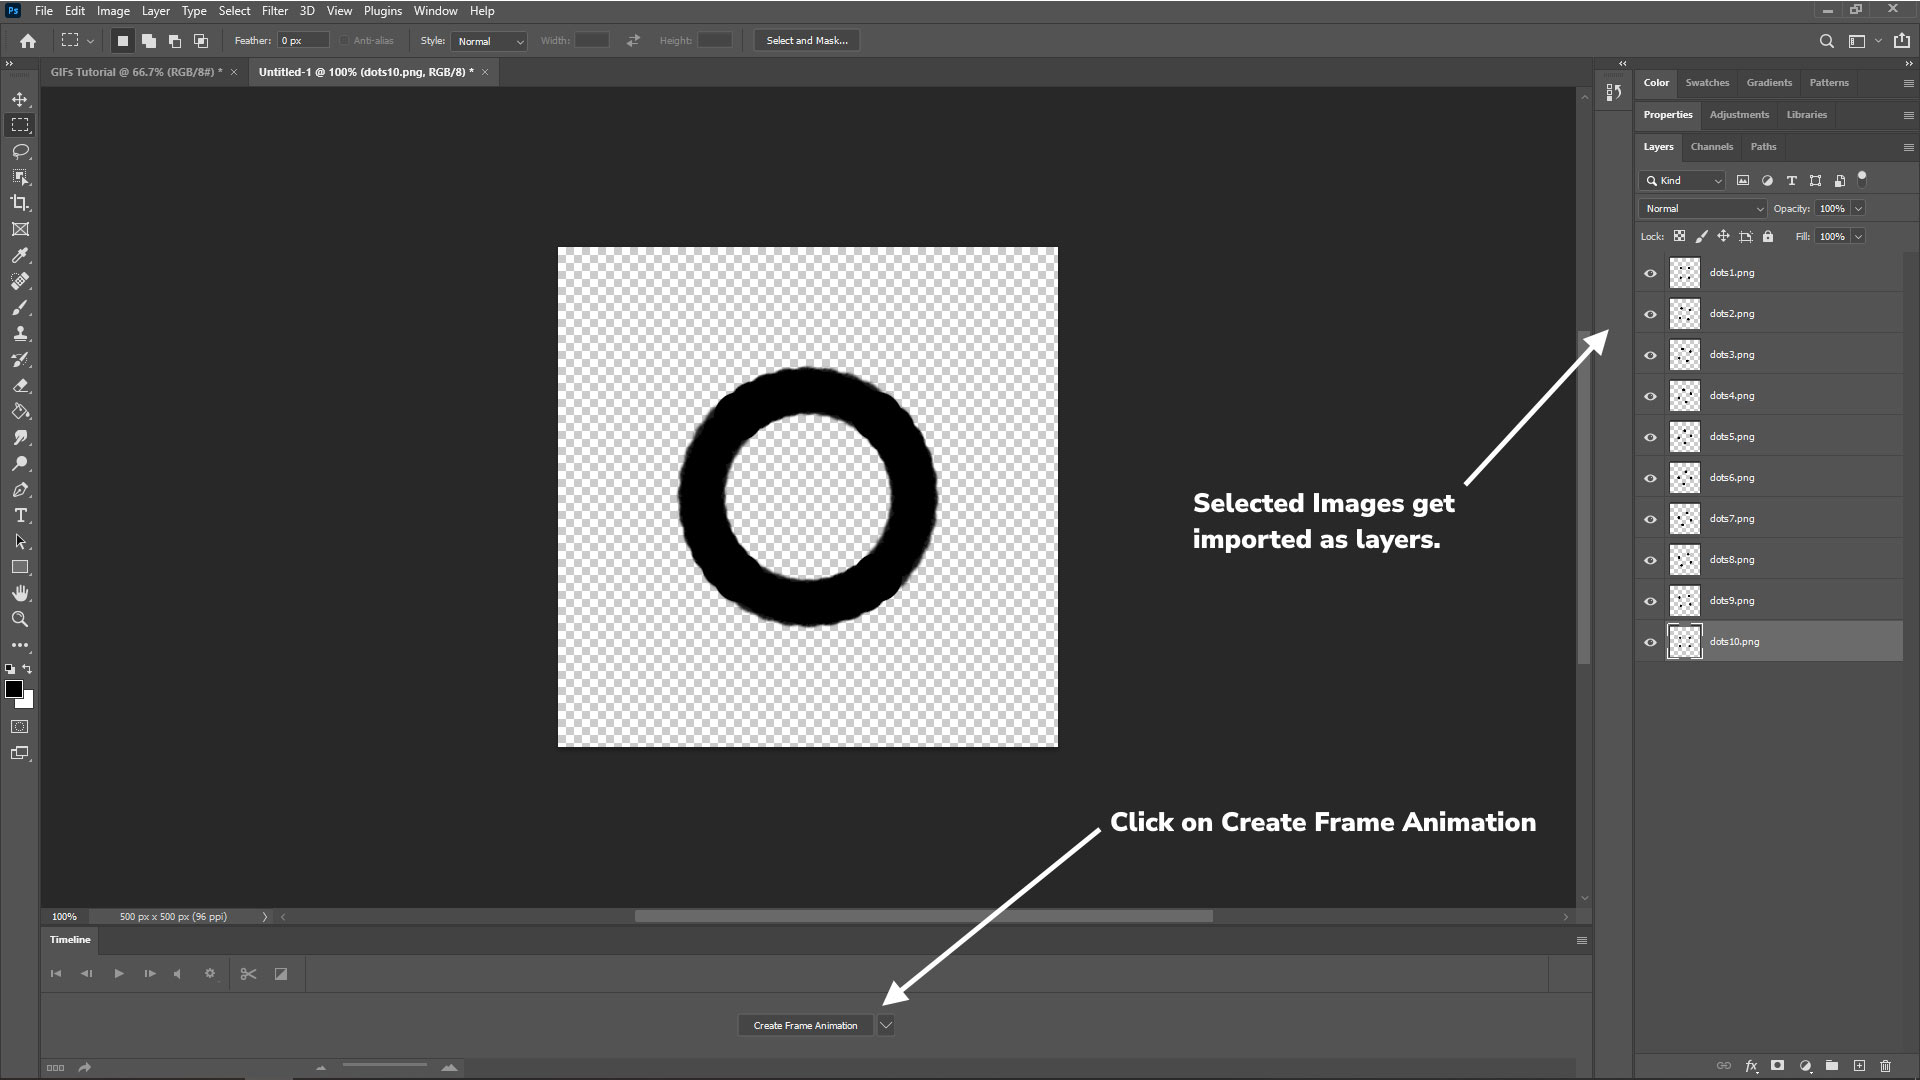
Step 2: Following that, one of the top (first image) will appear. Now, to make an animated GIF, go to the "Timeline" window and select the "Create Frame Animation" option.
Step 3: This will automatically build our first frame. You can make the next frame by going to the flyout menu and selecting "Make frame from layers", as indicated in the picture.
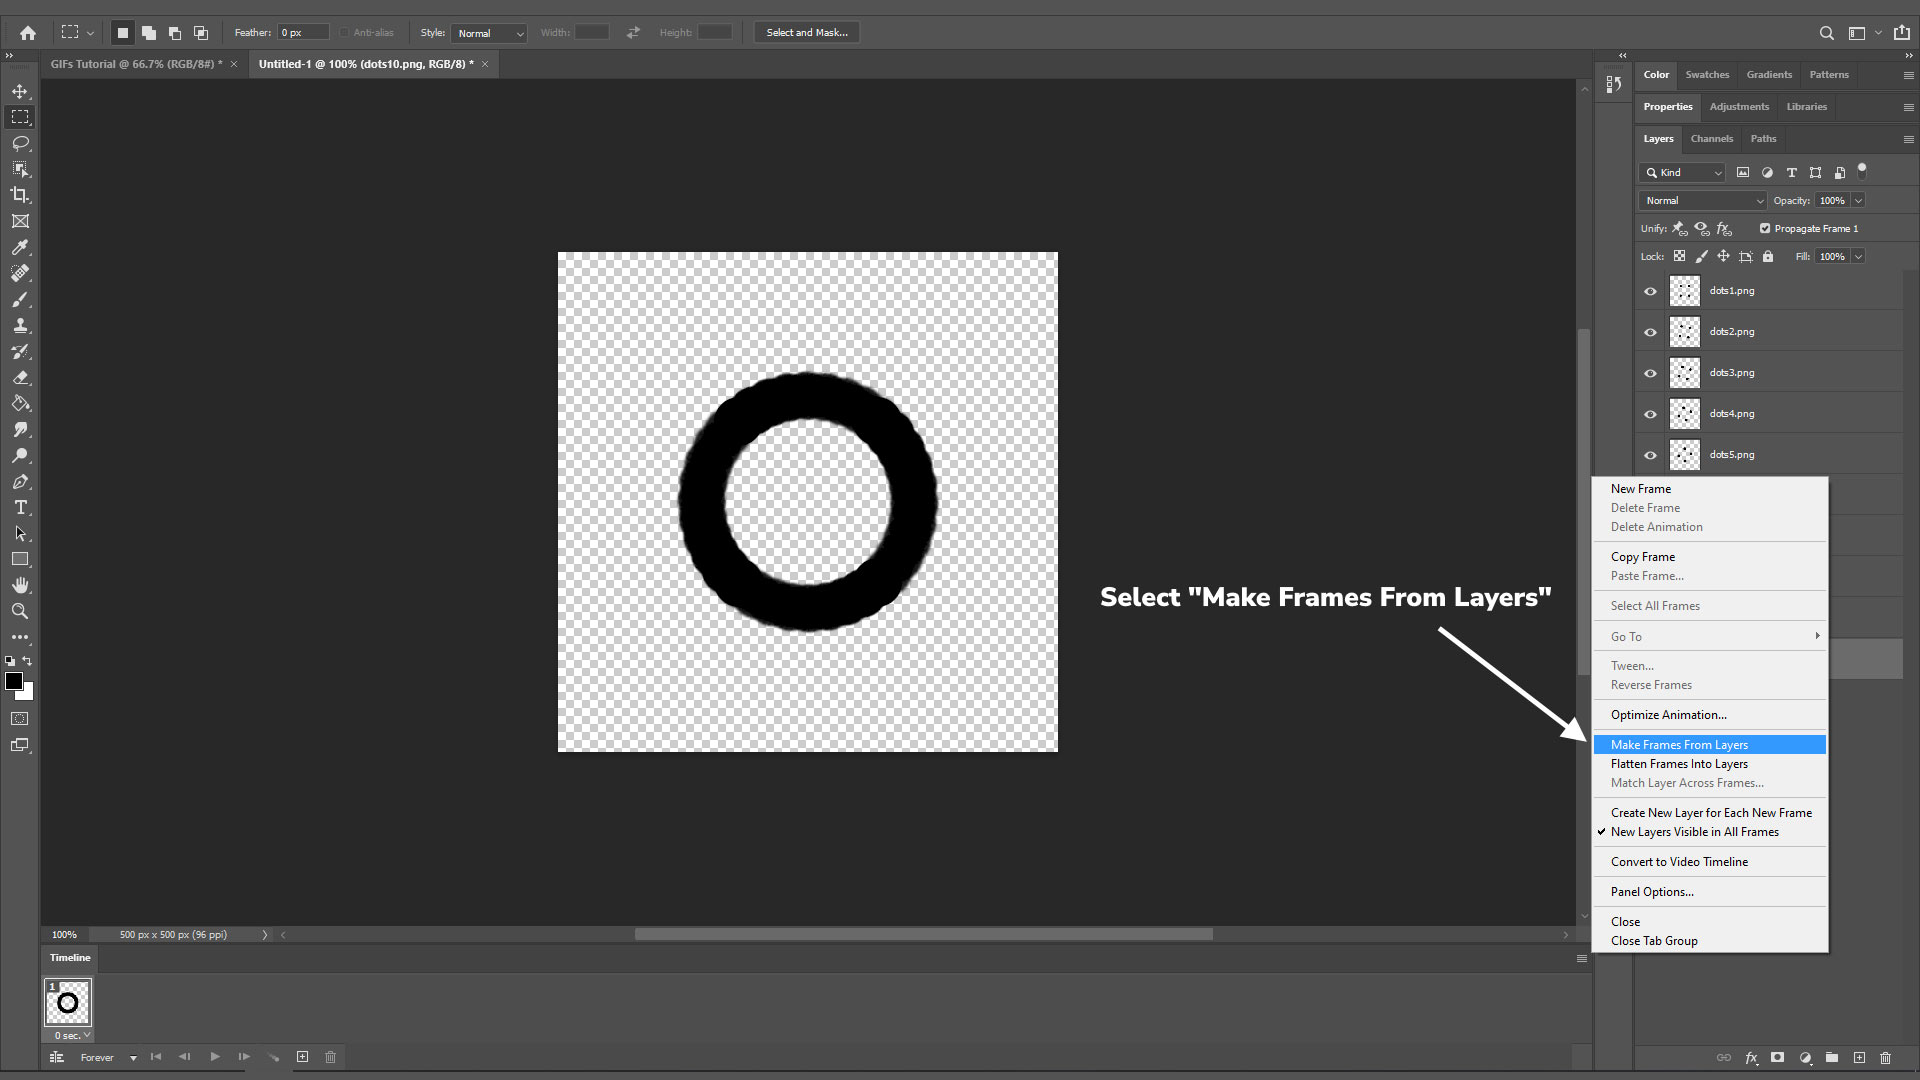
Within this GIF animation, each layer will now become a frame.
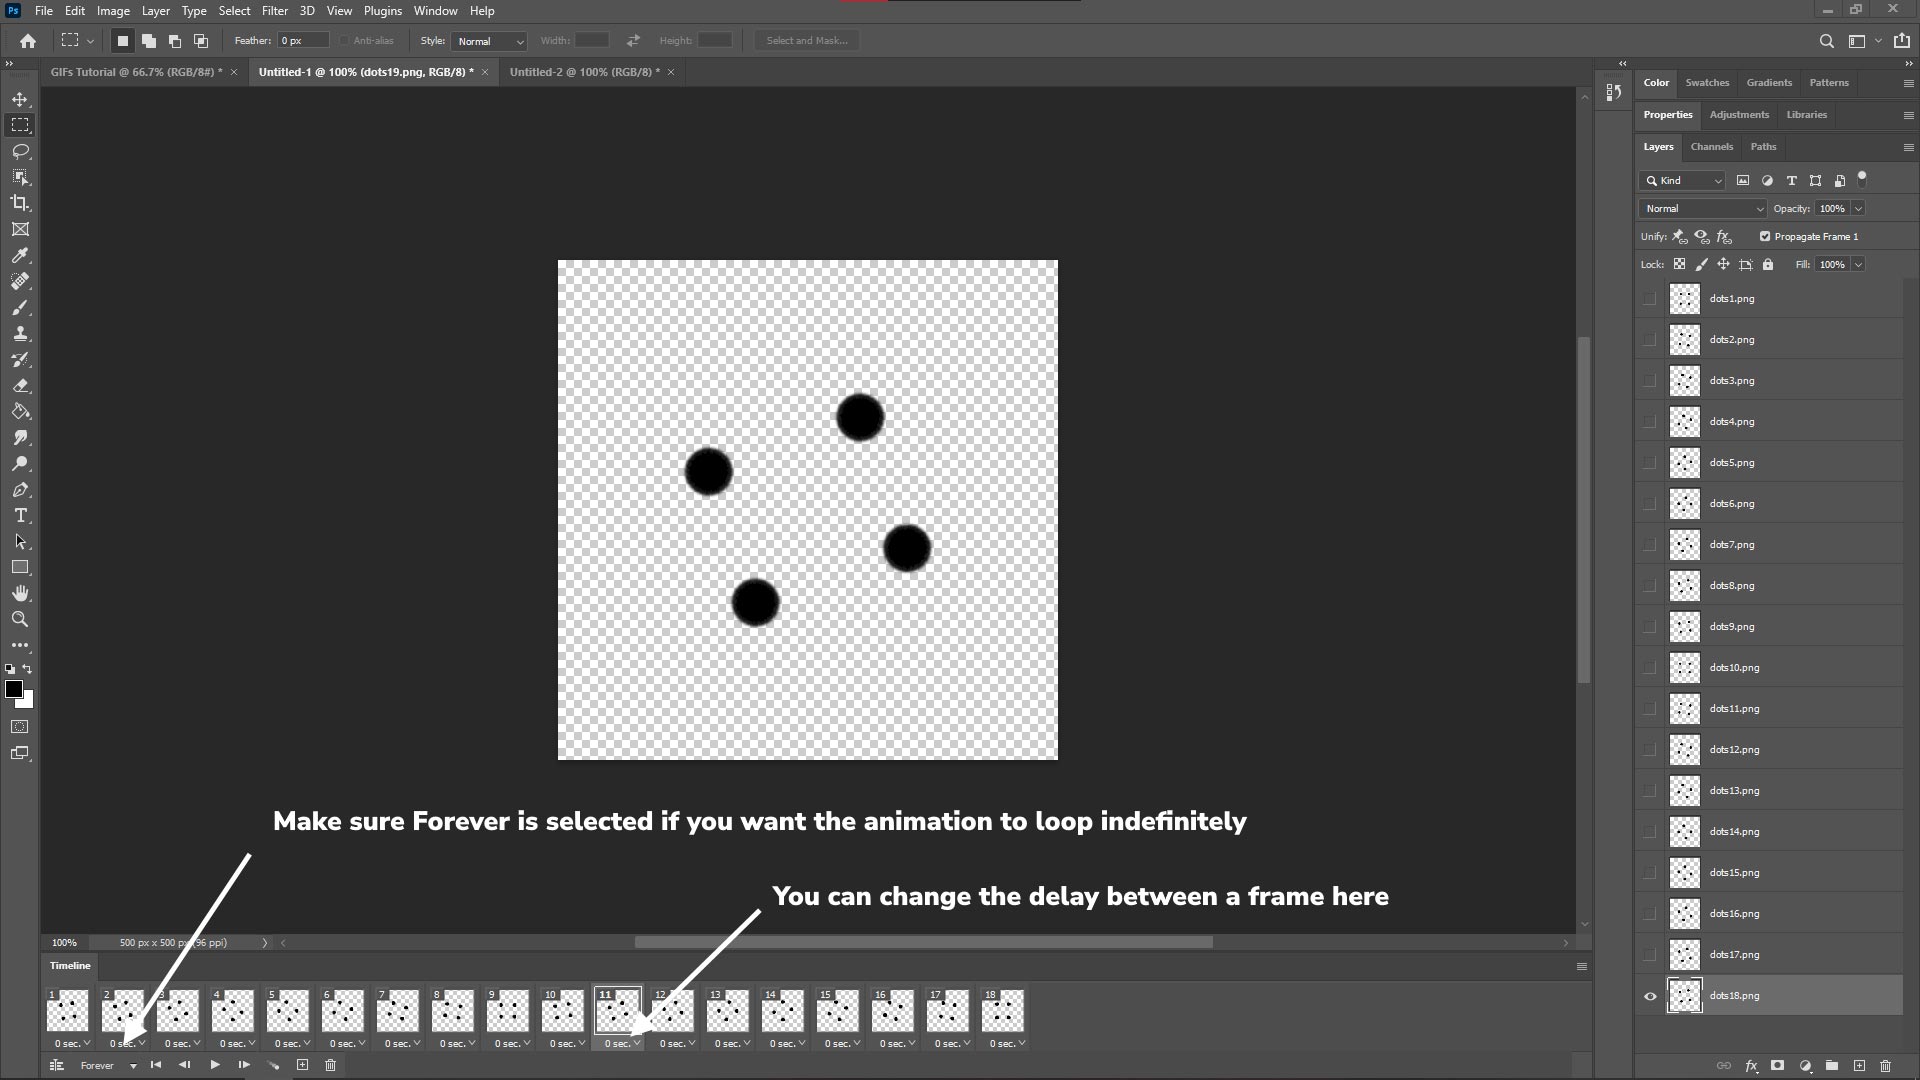
Step 4: By default, it will only play once for the time being. As a result, the image you chose only repeats once before stopping.
We'll use forever as an example. We can now select all of the frames by holding down the Shift key and choosing the final frame and set the timing to 0.1 second. You can go faster or slower as per your own speed.
Press the Okay button to watch the preview.
Step 5: The gif animation has not yet been created at this time. At this point, it is simply a multilayered file. It's time to save them now.
So, go to the File menu and select Save As. You can now select to save the master file back into the resource file or to your desktop. Assign a name to your gif file. Save it.
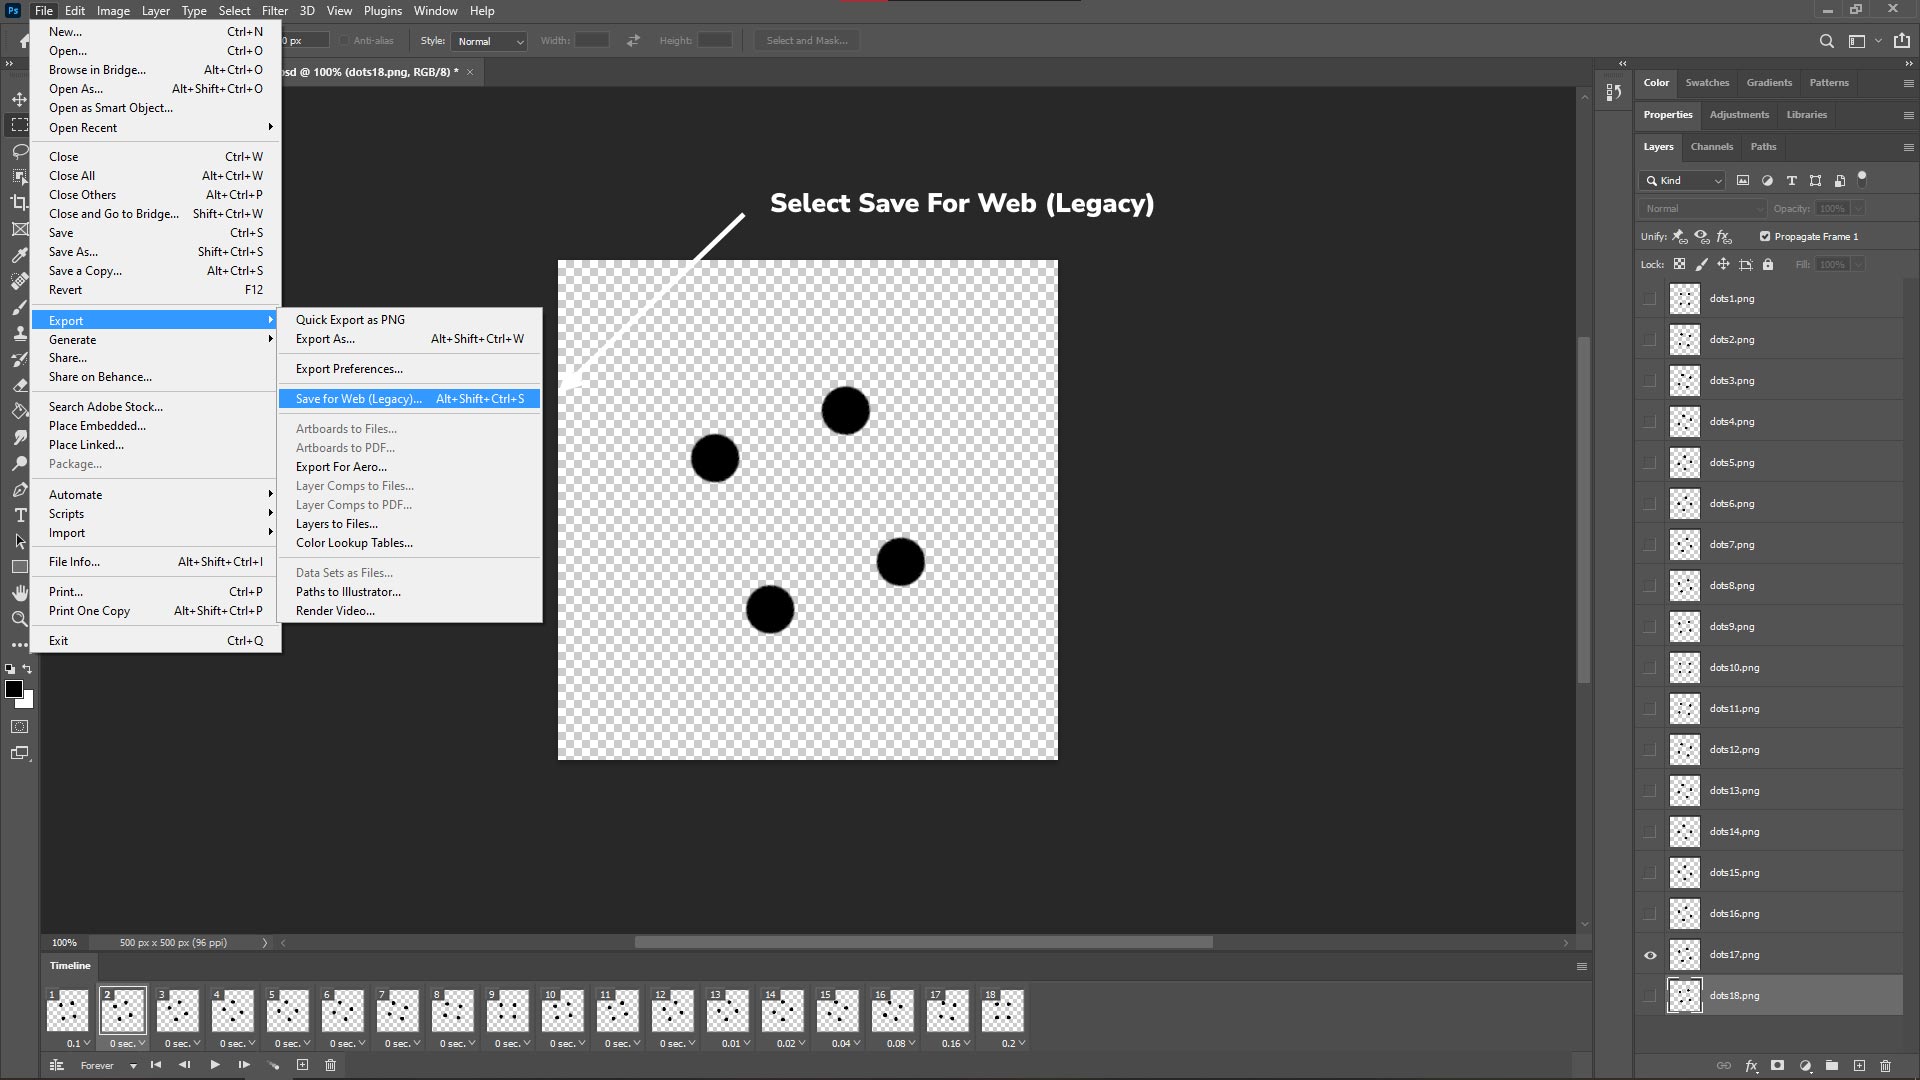
Now we'll make an animated GIF that can be posted to the web. So, go down to File and pick Export, then "Save for web (legacy)". Then hit the "Save" button.
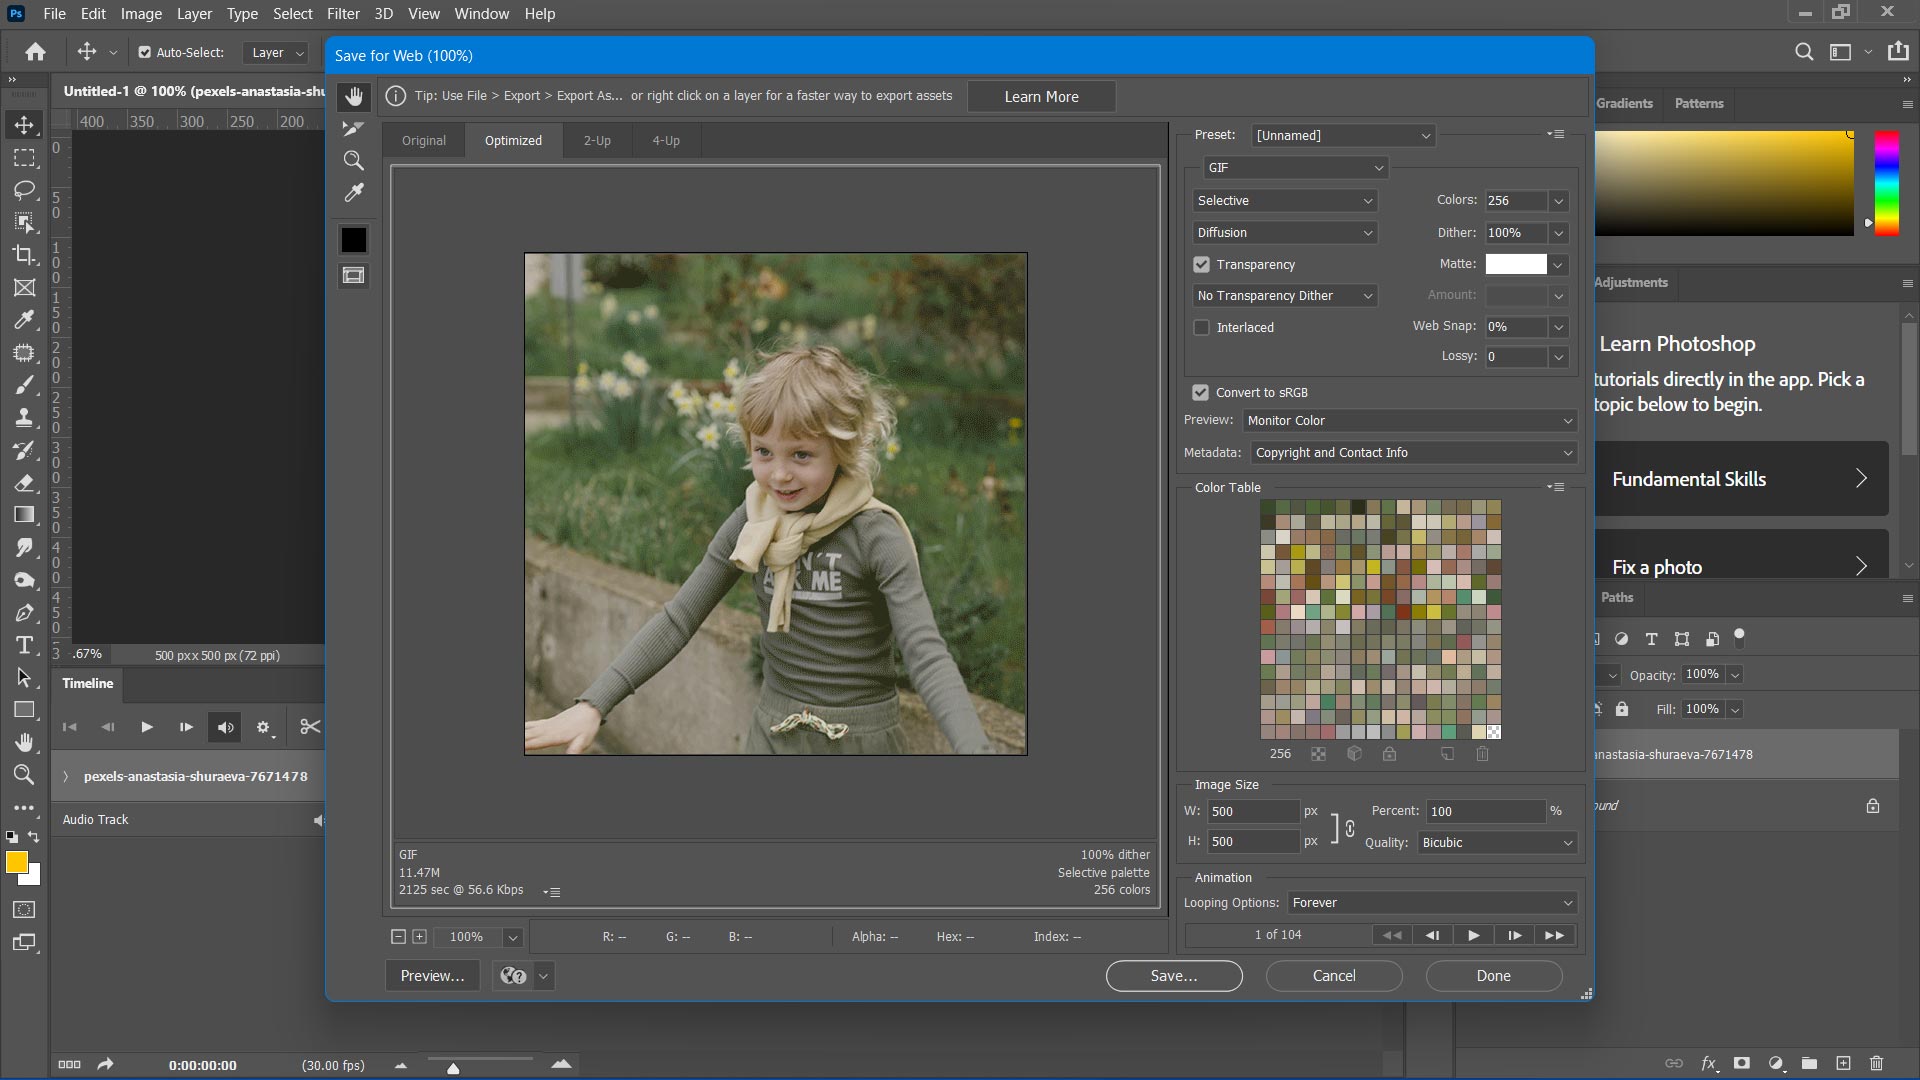
Step 6: You can now choose the colors for the gif. For a smooth gradation, maximum is recommended. You can also select from a variety of color palettes, including adaptive, selective, and perspective. For the time being, keep selective.
Check the "Convert to SRGB" box to avoid color shifts when playing in a web browser. Then click the Save button, select your location, and click the Save button again.
Voila, now, web browsers will happily play these animated gifs once you drag the animated GIF into the web browser. We can even attach them to emails and send a little animation to our pals that way.
If you found this article helpful in creating a GIF in Photoshop, do let us know in the comments section below. You can also reach out to us for troubleshooting any particular issue you’re facing.
Talk soon !
This blog provides a step-by-step guideline to help you change the store name of your Shopify website correctly and easily.
Learn how to add a product in a few simple steps, from adding a new product in your admin menu, to uploading and releasing the product to your...
Check out this step-by-step guide on how to change your business name on Facebook page.
Leave A Reply